wanna know how it's done?...well...here's a tutorial that i whipped up...
you'll need...
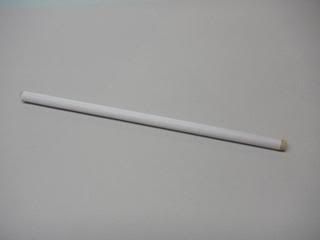
wooden dowel cut at 9"
ribbon to cover dowel...or paint it...whichever is easiest...
empty cardboard ribbon thingie (sorry for the technical term...lol)
ribbon for bow
whatever goodies to fill bucket...
embellies to make it look purty
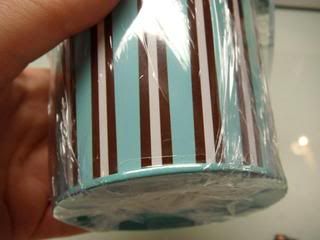
bucket...i know this isn't the one in the rest of the tutorial...had to take a pic afterwards...so think of this as a stunt bucket...
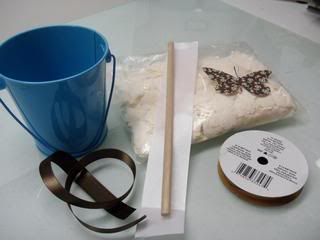
you also need:
heat gun
oops...forgot the shrink wrap...but you'll need that or cello
glue gun
bath scrubbie
plastic wrap, paper towels, or whatever to use as a pre filler
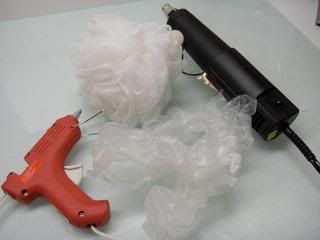
first you want to prep the wooden dowel...i covered with ribbon...but you can certainly paint it...
next..you'll want to take empty ribbon thingie and hot glue the dowel into the hole...i actually do this when it's inside the bucket...just push the ribbon thingie as far down as it'll go...then insert the dowel...make sure it's straight and hot glue away...
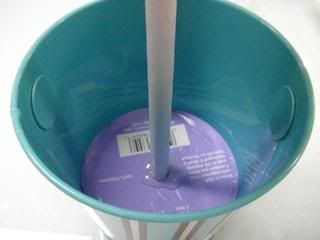
then...you'll want to take either your saran wrap or whatever you're using to kinda fill in before adding your goodies...you know...something to take up space...other than our husbands!...ohhh...sorry...i just had to...
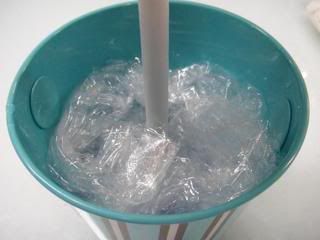
now it's time to add the goodies...like i said...i used bath confetti...but sky's the limit on what you want to use...
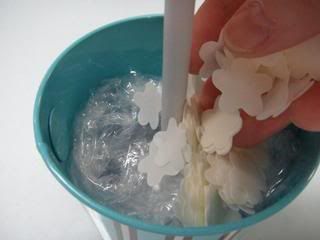
fill all the way to the top...
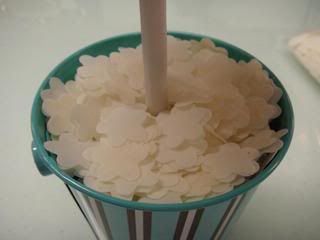
here's what you should have...a headless topiary...nevermind the mess...just focus on the project...hee hee...
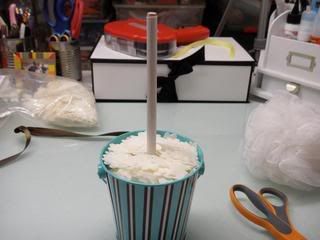
now you'll take your shrink wrap...making sure that it'll cover the sides of the bucket all the way to underneath it...find the center of it...and cut a tiny circle...just big enough to fit around the dowel...i folded it in half...used a hole punch...and then trimmed a little bit more to get the size i needed...slip the dowel through the hole and slide all the way until it's flat on the confetti...
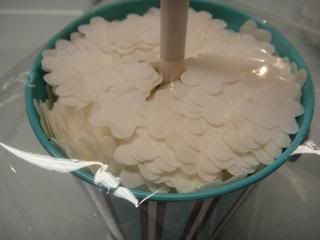
this is the point where you'll take all the shrink wrap and smooth down the sides of the bucket and tape underneath...then you'll take your heat gun and shrink away...but you can certainly use cello for another look!...you'll just cut a square big enough...gather up and tie!...now this pic is post shrinking...but you can see how it's taped underneath...only heat up the sides and top...don't worry about the bottom...if it's not sitting level...then maybe hit it with some heat...
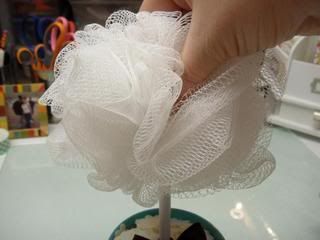
take your bath scrubbie and put on top of dowel...
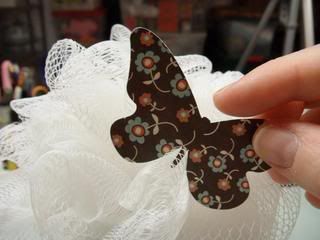
add your butterfly (woah...where'd his antennae go?) and bow at base and you're done!...
***like i said before...anything is interchangeable with the project!...i just wanted to keep with a bath type theme...so that's why i used the confetti...also...i mentioned that you can you cello to wrap it up...since the bow's at the base (cleverly disguises the hole) it's nothing to have it gathered up with a bow!...let me know if you have any questions!...or if my directions were crappy!...


Hello Friend!!! What a great gift idea! Thanks for sharing.
ReplyDeleteLorraineB
Another creative suggestion. I was just looking at a food network mag this morning with a topiary and I think they used cupcakes? Anyhoo... Was just thinking how cute it is when people think outside the box, and then I see that you went ahead and did just that! LOL! Great job - Looks amazing.
ReplyDeleteThat is a great idea and so very cute. It would make really cute gifts for a wedding shower give away. I am going to have to remember this.
ReplyDeleteyou are so clever and hilarious too
ReplyDelete(you'll want to take either your saran wrap or whatever you're using to kinda fill in before adding your goodies...you know...something to take up space...other than our husbands!...ohhh...sorry...i just had to...)
LMAO
I love how your creative mind works and that you are so kind to share it with us!!!!
ReplyDeleteLove this! Thanks for sharing all your creative ideas with us!
ReplyDeleteThis is really friggin cute! Love your blog!
ReplyDeleteWow - this is so cool!! TFS
ReplyDeleteWhat a cute idea! It would make wonderful shower center pieces and then door prizes. Thanks for the instructions.
ReplyDeleteOooh! I have girls with birthdays coming up! These would be great to give out at the party!!
ReplyDeleteGreat tutorial!! Thank you!
I love this! You come up with such outta-the-box ideas!! Now I have to see if I can find some buckets :)
ReplyDeleteThank you for sharing and the instructions. :)
Very cool idea! Thanks so much for sharing!! I love your blog!
ReplyDeletelove the laughter you create here along with your projects!!!lol!
ReplyDeleteYour ideas are so cool. Did you know? So. Cool! :)
ReplyDeleteGirl, you have the most amazing ideas. Thanks for sharing. Your project turned out great.
ReplyDeleteSuch a great idea!
ReplyDeleteAs always, you never disappoint. Very clever indeed!
ReplyDeleteI love this..... so much I made some of my own, you can see them on my blog @ kerieskafe.blogspot.com
ReplyDeleteThank you for all your creative ideas!!!!
Love all your projects- and your wonderful descriptions and instructions! Thanks for sharing!
ReplyDeleteI love this. It is such a great gift idea. Thanks for sharing!
ReplyDeleteI love it!! Can you tell me where I can find shrink wrap?
ReplyDeleteyou can get the shrink wrap at m's!...it's over with cello!...make sure to use your coupon!...
ReplyDeleteThanks for the idea, I loved to show you what I made. I can't see to get through your contact button. from sara... sluna2@zoominternet.net
ReplyDeleteThis is so cute! I just love it. You could use it as a decoration for tables at showers..baby stuff for baby showers, bridal showers, mother's day teas, you name it. I'm going to share this with friends.
ReplyDeletehttp://katspurrfectboutique.blogspot.com
Kat @ Kat's Almost Purrfect World
P.S. Can I link this to my blog?
ReplyDeleteThanks, Katharine
http://katspurrfectboutique.blogspot.com
Kat @ Kat's Almost Purrfect World
Your blog is on my fav's as it is just my FAVORITE place to be!! You are so creative and talented and I just love the fabulous instructions!! You are an inspiration! I just can't say enough!!!
ReplyDeleteGreat mind's think a like : ) I use to sell these on etsy. I actually just did a post on them http://www.jcsloft.com/2010/09/can-i-do-you-favor.html.
ReplyDeleteI like the butterfly you added to the sponge!
I actually ended up here from Pony Tails and Fish Scales' link to your record bowl tutorial, but it was so good, I had to take a look around. This is AWESOME! I'm planning on doing handmade gifts for Christmas this year, so this is really great!
ReplyDeleteI love this! Such a fun and whimsical idea, especially for a child's bathroom! Love it
ReplyDeleteI wanted to thank you for all your wonderfull ideas. I love viewing your blog and finding new ideas all the time. Thanks again for sharing.
ReplyDeletebut how do you fix the scrubbie to the dowel? if you glue it then you cant use it ... ooo its a dilema :)
ReplyDelete